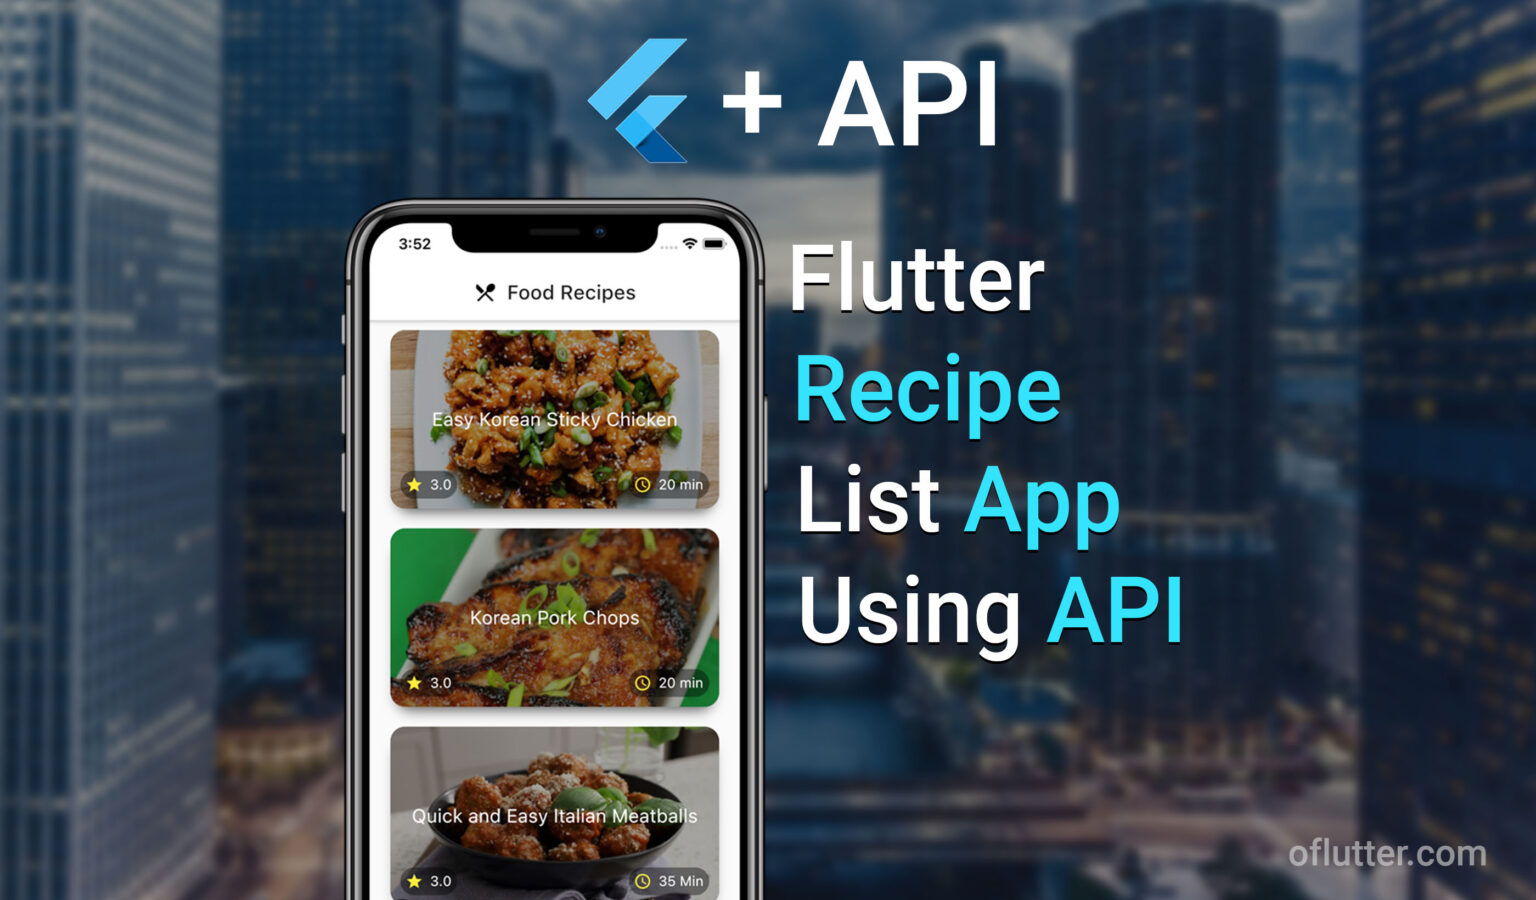
In this article, we will learn how to create a simple recipe list app using Flutter and API. This tutorial is for absolute beginners who want to learn how to make the right API structure in the project and use it in the app.
This article is more of a guide for the video tutorial that I created. Please, check the conclusion for the video link
Note: This tutorial is for integrating API to the flutter app, and not how to create custom widgets and/or layout.
Table of Contents
1. Install dependancies and project setup
Before we begin to integrate our new app from scratch, we need to configure and install the necessary dependencies in our newly created project.
Go to pubspec.yaml and turn off null safety feature.
environment:
  sdk: ">=2.7.0 <3.0.0"
We are not going to use null safety because for new developers it might be really hard to understand and work with it. So, by setting sdk: “>=2.7.0 <3.0.0” we are disabling it.
Next, we are going to set up dependencies that we are going to use in our project.
- http: ^0.13.1
Note: At the time you are reading this article, a newer version of this dependence may be released. Please, check the pub.dev website for updates.
This is how your dependencies should look so far.
dependencies:
  flutter:
    sdk: flutter
  http: ^0.13.1
2. Project Structure
In this step, let’s create the right project structure so we have our code organized and reusable.
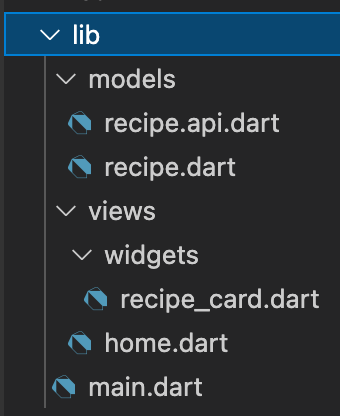
Go to lib folder, and create: models and views folders. Then, inside models create two files recipe.dart and recipe.api.dart. In the views folder, create home.dart and widgets folder. Finally, inside widgets folder, create recipe_card.dart file.
I know it might be confusing for the beginner, so here are the dropdown details of the lib folder.
- models – this folder will contain our Recipe class and API class.
- recipe.dart – this file will contain our Recipe object
- recipe.api.dart – this file will contain our function to communicate between an app and the web server using API.
- views – this folder will contain our pages for the app
- home.dart – this file is our main page of the app
- widgets – this folder will contain our custom widgets
- recipe_card.dart – this file is our custom recipe card widget
The final project setup should look like this:
Note: Since we are going to use only one model – recipe, we will not create a separate file for it. However, if you have more than one model, then it’s better to create a separate file e.g models -> recipe -> [recipe.api.dart, recipe.dart]
3. Create Custom Recipe Widget (recipe_card.dart)
In this step, we will create a custom recipe widget card that will be displayed on the home screen. Since I was mentioned at the beginning of the video that this tutorial is focused on the API. You can just copy and paste the code below and put it in the recipe_card.dart file
import 'package:flutter/material.dart';

class RecipeCard extends StatelessWidget {
  final String title;
  final String rating;
  final String cookTime;
  final String thumbnailUrl;
  RecipeCard({
    @required this.title,
    @required this.cookTime,
    @required this.rating,
    @required this.thumbnailUrl,
  });
  @override
  Widget build(BuildContext context) {
    return Container(
      margin: EdgeInsets.symmetric(horizontal: 22, vertical: 10),
      width: MediaQuery.of(context).size.width,
      height: 180,
      decoration: BoxDecoration(
        color: Colors.black,
        borderRadius: BorderRadius.circular(15),
        boxShadow: [
          BoxShadow(
            color: Colors.black.withOpacity(0.6),
            offset: Offset(
              0.0,
              10.0,
            ),
            blurRadius: 10.0,
            spreadRadius: -6.0,
          ),
        ],
        image: DecorationImage(
          colorFilter: ColorFilter.mode(
            Colors.black.withOpacity(0.35),
            BlendMode.multiply,
          ),
          image: NetworkImage(thumbnailUrl),
          fit: BoxFit.cover,
        ),
      ),
      child: Stack(
        children: [
          Align(
            child: Padding(
              padding: EdgeInsets.symmetric(horizontal: 5.0),
              child: Text(
                title,
                style: TextStyle(
                  fontSize: 19,
                ),
                overflow: TextOverflow.ellipsis,
                maxLines: 2,
                textAlign: TextAlign.center,
              ),
            ),
            alignment: Alignment.center,
          ),
          Align(
            child: Row(
              mainAxisAlignment: MainAxisAlignment.spaceBetween,
              children: [
                Container(
                  padding: EdgeInsets.all(5),
                  margin: EdgeInsets.all(10),
                  decoration: BoxDecoration(
                    color: Colors.black.withOpacity(0.4),
                    borderRadius: BorderRadius.circular(15),
                  ),
                  child: Row(
                    children: [
                      Icon(
                        Icons.star,
                        color: Colors.yellow,
                        size: 18,
                      ),
                      SizedBox(width: 7),
                      Text(rating),
                    ],
                  ),
                ),
                Container(
                  padding: EdgeInsets.all(5),
                  margin: EdgeInsets.all(10),
                  decoration: BoxDecoration(
                    color: Colors.black.withOpacity(0.4),
                    borderRadius: BorderRadius.circular(15),
                  ),
                  child: Row(
                    children: [
                      Icon(
                        Icons.schedule,
                        color: Colors.yellow,
                        size: 18,
                      ),
                      SizedBox(width: 7),
                      Text(cookTime),
                    ],
                  ),
                )
              ],
            ),
            alignment: Alignment.bottomLeft,
          ),
        ],
      ),
    );
  }
}
4. Create Home Page View (home.dart)
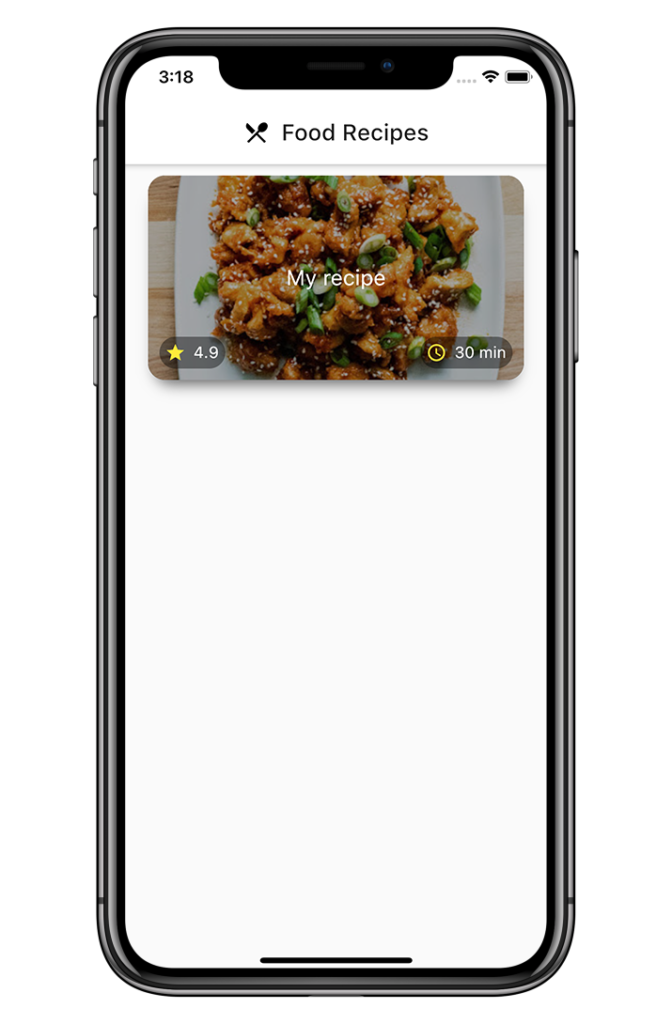
In this step, we will create an initial home page for our app. In the home.dart file, create a stateful widget and return a scaffold instead of a container. Inside scaffold add AppBar widget, and create a title. Import RecipeCard widget and return in body widget.
Then, populate a RecipeCard with fake data for now. We will use it within API a bit later.
This is how your code should looks like:
import 'package:flutter/material.dart';
import 'package:food_recipe/views/widgets/recipe_card.dart';

class HomePage extends StatefulWidget {
  @override
  _HomePageState createState() => _HomePageState();
}

class _HomePageState extends State<HomePage> {
  @override
  Widget build(BuildContext context) {
    return Scaffold(
        appBar: AppBar(
          title: Row(
            mainAxisAlignment: MainAxisAlignment.center,
            children: [
              Icon(Icons.restaurant_menu),
              SizedBox(width: 10),
              Text('Food Recipes'),
            ],
          ),
        ),
        body: RecipeCard(
          title: 'My recipe',
          rating: '4.9',
          cookTime: '30 min',
          thumbnailUrl: 'https://lh3.googleusercontent.com/ei5eF1LRFkkcekhjdR_8XgOqgdjpomf-rda_vvh7jIauCgLlEWORINSKMRR6I6iTcxxZL9riJwFqKMvK0ixS0xwnRHGMY4I5Zw=s360',
        ));
  }
}
5. Refactor main.dart file
Finally, before we begin to work with API, let’s go to our main.dart file and refactor everything.
Your code should look like this:
import 'package:flutter/material.dart';
import 'package:food_recipe/views/home.dart';

void main() {
  runApp(MyApp());
}

class MyApp extends StatelessWidget {
  @override
  Widget build(BuildContext context) {
    return MaterialApp(
      title: 'Food recipe',
      debugShowCheckedModeBanner: false,
      theme: ThemeData(
        primarySwatch: Colors.blue,
        primaryColor: Colors.white,
        textTheme: TextTheme(
          bodyText2: TextStyle(color: Colors.white),
        ),
      ),
      home: HomePage(),
    );
  }
}
Now, if you refresh and reload, your app should look like this.
6. Integrating API with an app
Now, we can finally begin to integrate API with an app. We are going to use a Yummly API to receive recipes. So, go to the Yummly API and register there, the price is free for 500 requests per month. So, you will be able to make only 500 requests for free within your account.
Now, what we are going to use from this API is GET feeds/list. A quick note, I will blur the x-rapidapi-key because of the limitation of 500 requests. So, use your own key.
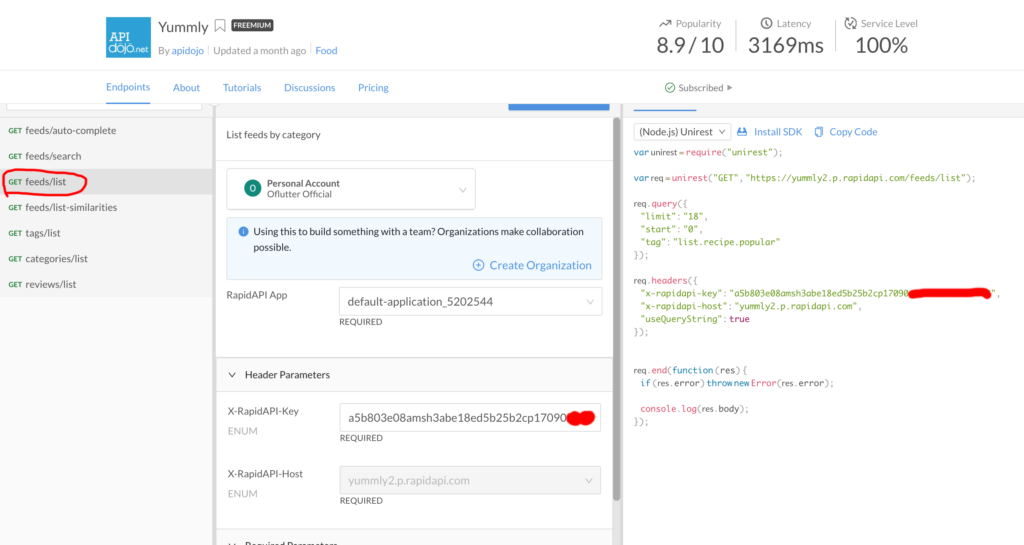
Now, leave the tab open, and come back to the Flutter project
7. Create Recipe class (recipe.dart)
Now, go to recipe.dart file in models folder and create a Recipe class.
You code should look like this:
class Recipe {
  final String name;
  final String images;
  final double rating;
  final String totalTime;

  Recipe({this.name, this.images, this.rating, this.totalTime});

  factory Recipe.fromJson(dynamic json) {
    return Recipe(
        name: json['name'] as String,
        images: json['images'][0]['hostedLargeUrl'] as String,
        rating: json['rating'] as double,
        totalTime: json['totalTime'] as String);
  }

  static List<Recipe> recipesFromSnapshot(List snapshot) {
    return snapshot.map((data) {
      return Recipe.fromJson(data);
    }).toList();
  }

  @override
  String toString(){
    return 'Recipe {name: $name, image: $images, rating: $rating, totalTime: $totalTime}';
  }
}
8. Create Recipe API
In this step, we will create a Recipe API class to communicate between the web server and our app.
Go to recipe.api.dart file and create our RecipeAPI class
Your code should look like this:
import 'dart:convert';
import 'package:food_recipe/models/recipe.dart';
import 'package:http/http.dart' as http;

class RecipeApi {
  static Future<List<Recipe>> getRecipe() async {
    var uri = Uri.https('yummly2.p.rapidapi.com', '/feeds/list',
        {"limit": "18", "start": "0", "tag": "list.recipe.popular"});

    final response = await http.get(uri, headers: {
      "x-rapidapi-key": "YOUR API KEY FROM YUMMLY API",
      "x-rapidapi-host": "yummly2.p.rapidapi.com",
      "useQueryString": "true"
    });

    Map data = jsonDecode(response.body);
    List _temp = [];

    for (var i in data['feed']) {
      _temp.add(i['content']['details']);
    }

    return Recipe.recipesFromSnapshot(_temp);
  }
}
Note: Instead of “x-rapidapi-key”: “YOUR API KEY FROM YUMMLY API“, put your API KEY from Step #6
9. Make and API Call Inside Home Page
Finally, call the API getRecipes() inside home.dart page.
Your code should looks like this
import 'package:flutter/material.dart';
import 'package:food_recipe/models/recipe.api.dart';
import 'package:food_recipe/models/recipe.dart';
import 'package:food_recipe/views/widgets/recipe_card.dart';
class HomePage extends StatefulWidget {
@override
_HomePageState createState() => _HomePageState();
}
class _HomePageState extends State<HomePage> {
List<Recipe> _recipes;
bool _isLoading = true;
@override
void initState() {
super.initState();
getRecipes();
}
Future<void> getRecipes() async {
_recipes = await RecipeApi.getRecipe();
setState(() {
_isLoading = false;
});
}
@override
Widget build(BuildContext context) {
return Scaffold(
appBar: AppBar(
title: Row(
mainAxisAlignment: MainAxisAlignment.center,
children: [
Icon(Icons.restaurant_menu),
SizedBox(width: 10),
Text('Food Recipe')
],
),
),
body: _isLoading
? Center(child: CircularProgressIndicator())
: ListView.builder(
itemCount: _recipes.length,
itemBuilder: (context, index) {
return RecipeCard(
title: _recipes[index].name,
cookTime: _recipes[index].totalTime,
rating: _recipes[index].rating.toString(),
thumbnailUrl: _recipes[index].images);
},
));
}
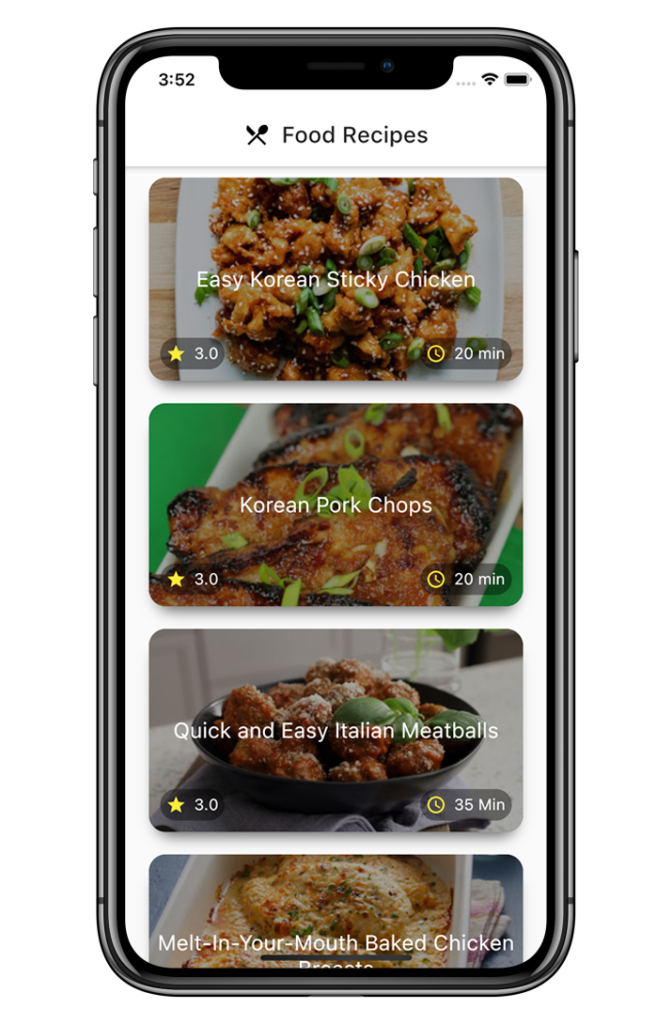
}This is final result of the app:
Conclusion
This was a guide on how to integrate an API with the Flutter app, go and check out my video for a more detailed explanation. YouTube Video Link